Darts checkout chart
What is the highest checkout?
170, thrown as treble 20, treble 20, bullseye. It is the only way to make exactly 170 with three darts and still end on a double, which is why it is the highest finish there is and why players call it the big fish.
Every finish, highest first
169 finishes shown.
- 170T20 T20 Bull
- 169cannot be finished on a double with three darts
- 168cannot be finished on a double with three darts
- 167T20 T19 Bull
- 166cannot be finished on a double with three darts
- 165cannot be finished on a double with three darts
- 164T20 T18 Bull
- 163cannot be finished on a double with three darts
- 162cannot be finished on a double with three darts
- 161T20 T17 Bull
- 160T20 T20 D20
- 159cannot be finished on a double with three darts
- 158T20 T20 D19
- 157T20 T19 D20
- 156T20 T20 D18
- 155T20 T19 D19
- 154T20 T18 D20
- 153T20 T19 D18
- 152T20 T20 D16
- 151T20 T17 D20
- 150T20 T18 D18
- 149T20 T19 D16
- 148T20 T16 D20
- 147T20 T17 D18
- 146T20 T18 D16
- 145T20 T15 D20
- 144T20 T20 D12
- 143T20 T17 D16
- 142T20 T14 D20
- 141T20 T19 D12
- 140T20 T20 D10
- 139T20 T13 D20
- 138T20 T18 D12
- 137T20 T19 D10
- 136T20 T20 D8
- 135T20 T17 D12
- 134T20 T14 D16
- 133T20 T19 D8
- 132T20 T16 D12
- 131T20 T13 D16
- 130T20 T18 D8
- 129T19 T16 D12
- 128T18 T14 D16
- 127T20 T17 D8
- 126T19 T19 D6
- 12525 T20 D20
- 124T20 T16 D8
- 123T19 T16 D9
- 122T18 T20 D4
- 121T20 T11 D14
- 120T20 S20 D20
- 119T19 T10 D16
- 118T20 S18 D20
- 117T20 S17 D20
- 116T20 S16 D20
- 115T20 S15 D20
- 114T20 S14 D20
- 113T20 S13 D20
- 112T20 S12 D20
- 111T20 S11 D20
- 110T20 S10 D20two darts: T20 Bull
- 109T20 S9 D20
- 108T20 S8 D20
- 107T19 S10 D20two darts: T19 Bull
- 106T20 S6 D20
- 105T20 S5 D20
- 104T18 S10 D20two darts: T18 Bull
- 103T19 S6 D20
- 102T20 S10 D16
- 101T17 S10 D20two darts: T17 Bull
- 100T20 D20
- 99T19 S10 D16
- 98T20 D19
- 97T19 D20
- 96T20 D18
- 95T19 D19
- 94T18 D20
- 93T19 D18
- 92T20 D16
- 91T17 D20
- 90T18 D18
- 89T19 D16
- 88T16 D20
- 87T17 D18
- 86T18 D16
- 85T15 D20
- 84T20 D12
- 83T17 D16
- 82T14 D20
- 81T19 D12
- 80T20 D10
- 79T13 D20
- 78T18 D12
- 77T19 D10
- 76T20 D8
- 75T17 D12
- 74T14 D16
- 73T19 D8
- 72T16 D12
- 71T13 D16
- 70T18 D8
- 69T19 D6
- 68T20 D4
- 67T17 D8
- 66T10 D18
- 65T19 D4
- 64T16 D8
- 63T13 D12
- 62T10 D16
- 61T15 D8
- 60S20 D20
- 59S19 D20
- 58S18 D20
- 57S17 D20
- 56S16 D20
- 55S15 D20
- 54S14 D20
- 53S13 D20
- 52S12 D20
- 51S11 D20
- 50S10 D20two darts: Bull
- 49S9 D20
- 48S8 D20
- 47S7 D20
- 46S6 D20
- 45S5 D20
- 44S4 D20
- 43S3 D20
- 42S10 D16
- 41S9 D16
- 40D20
- 39S7 D16
- 38D19
- 37S5 D16
- 36D18
- 35S3 D16
- 34D17
- 33S1 D16
- 32D16
- 31S15 D8
- 30D15
- 29S13 D8
- 28D14
- 27S11 D8
- 26D13
- 25S9 D8
- 24D12
- 23S7 D8
- 22D11
- 21S5 D8
- 20D10
- 19S3 D8
- 18D9
- 17S1 D8
- 16D8
- 15S7 D4
- 14D7
- 13S5 D4
- 12D6
- 11S3 D4
- 10D5
- 9S1 D4
- 8D4
- 7S3 D2
- 6D3
- 5S1 D2
- 4D2
- 3S1 D1
- 2D1
Every finish from 2 to 170. It works as a darts checkout calculator rather than a picture of a table: jump straight to the number you are on, filter by the darts actually in your hand, and copy a link to a finish if you want to send someone one.
The printable version
Every finish on one page, built from the same table as the chart above, so the two can never disagree. Save it, or put it on the wall by the board where a filter is no help to anybody.
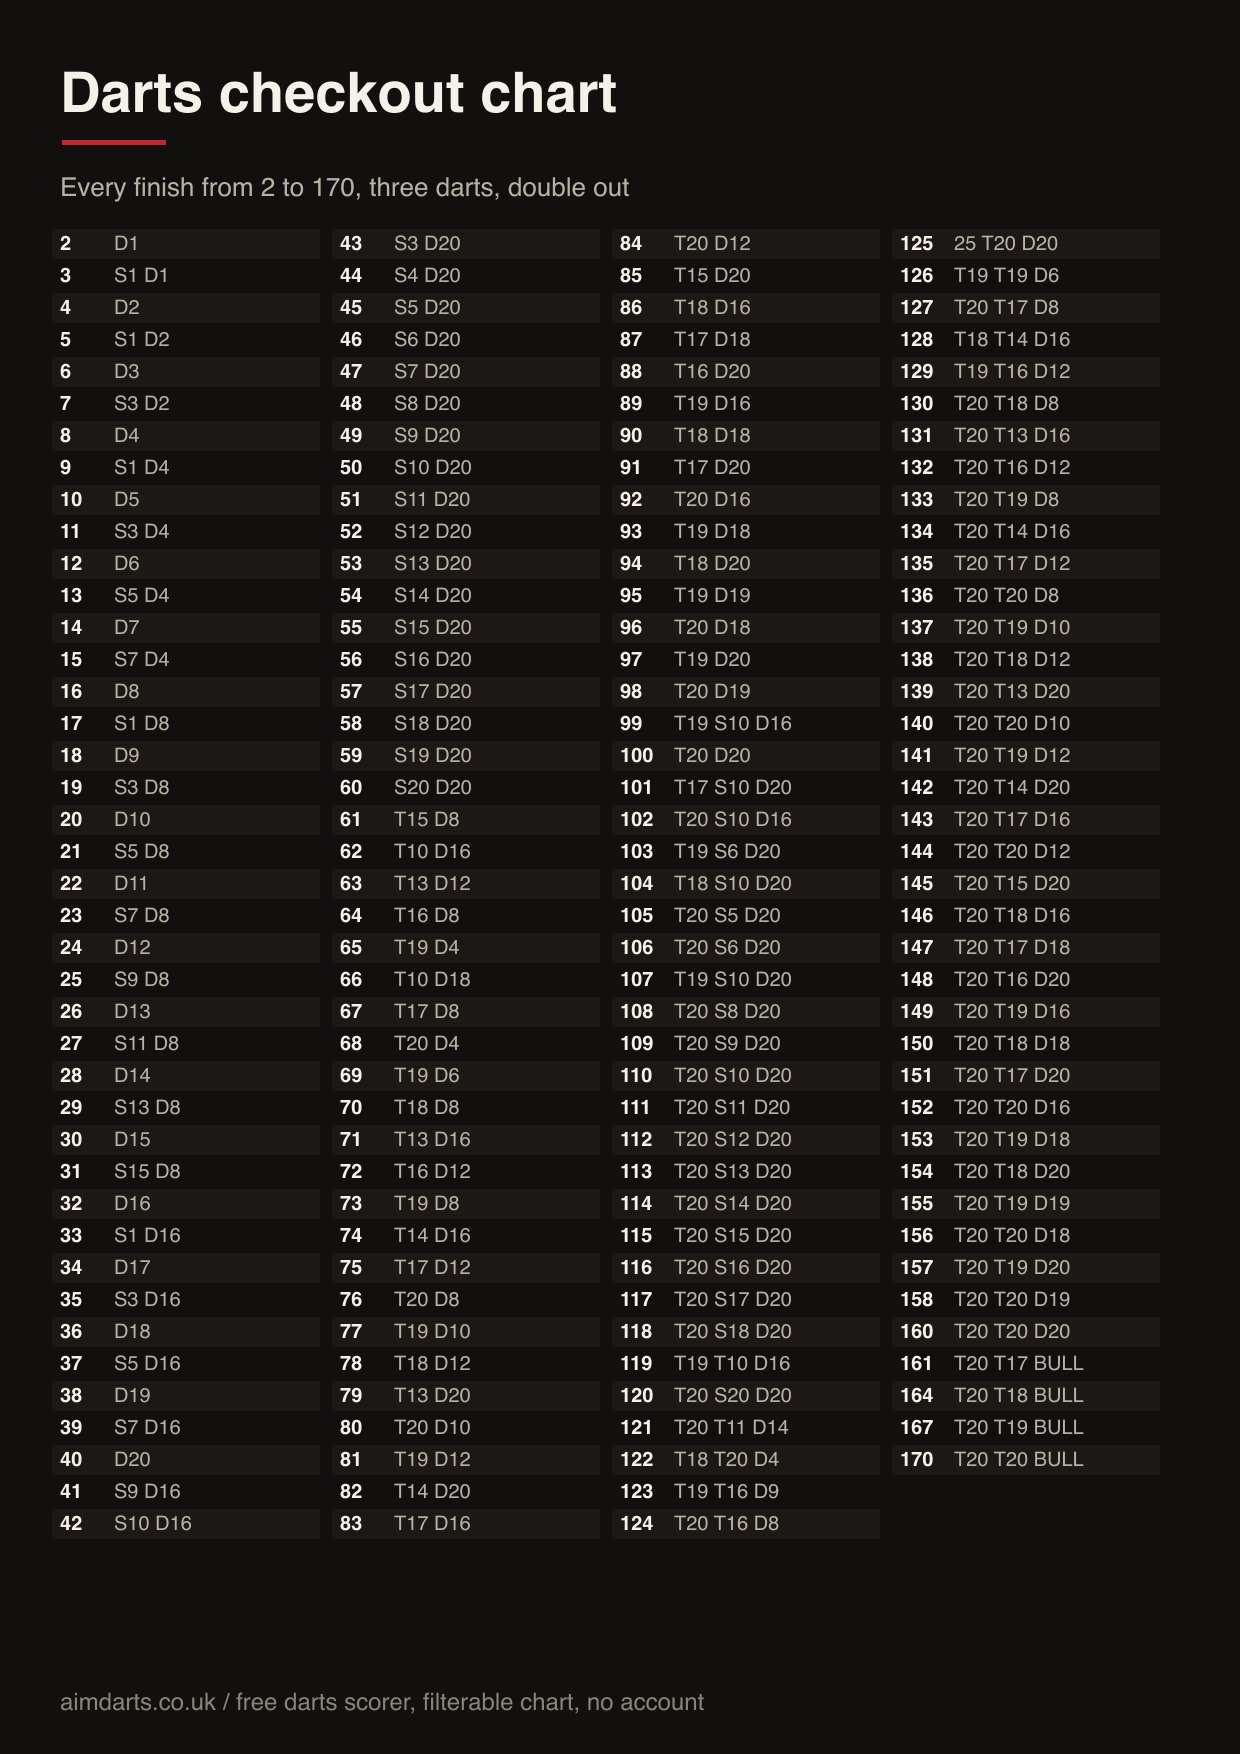
Knowing the route is half of it. Play a leg of 501 and the board offers the finish as it comes up, or read what a good three-dart average is, which is the question most people ask next.
The seven you cannot finish
Playing double out, these scores cannot be checked out with three darts at all. If a visit is going to leave you on one of them, leave something else instead.
169 168 166 165 163 162 159
The reason is arithmetic rather than difficulty. To finish you need a double, and the largest is the bull at 50. Take any of these seven, subtract every double available, and what is left cannot be made with the two darts you have. Playing straight out, four of them open up again, because the last dart no longer has to be a double.
What to leave yourself
The chart tells you the route. It does not tell you which route to want, and that is the part that wins legs.
32 is the number to aim for. Miss double 16 with a single and you are on 16, which is double 8. Miss that and you are on 8, then 4, then 2. Every miss still leaves you an even number and a dart at a double. That is why a player on 32 with three darts is in far better shape than the raw odds suggest.
40 comes up more often than anything else, so double 20 is the double you will throw most. It is worth practising even though it does not halve as kindly: a missed single 20 leaves 20, and a missed double 20 leaves 40 again.
Odd numbers are the ones to avoid. Leave 41 and your first dart has to make it even before you can start. That is why the routes here send you to an even leave wherever there is a choice.
How this chart is checked
Every route on this page is verified by the test suite rather than proofread. Each one has to add up to its own number, use three darts or fewer, and end on a valid finishing dart, and the build fails if any of them does not. A hand-typed chart with one wrong route in it is worse than no chart, because you only find out at the board.
Questions
- What is the highest checkout in darts?
- 170, thrown as treble 20, treble 20, bullseye. It is the highest score that can be finished from with three darts on a double, which is why players call it the big fish.
- Which numbers cannot be checked out?
- Playing double out, seven scores between 2 and 170 cannot be finished with three darts: 169, 168, 166, 165, 163, 162 and 159. A good player avoids leaving them. Anything above 170 needs at least four darts.
- What is the best double to leave yourself?
- Double 16, so 32. Miss it with a single 16 and you are left on 16, which is double 8; miss that and you are on 8, then 4, then 2. Every miss still leaves you an even number. Double 20 is the most popular because 40 comes up constantly, but a missed single 20 leaves 20 and a missed double 20 leaves 40 again.
- How many ways are there to check out 170?
- One. Treble 20, treble 20, bullseye is the only combination of three darts that makes exactly 170 and ends on a double, because the bull is the only double worth 50.